February 11, 1999
Game Ten
White: Allen Starfy
Black: Ty Davison
Opening: A48, King's Indian, London System
E-mail, Game 7, 1998
1. d4 Nf6
2. Nf3 g6
3. Bf4 d6
4. e3 Bg7
5. h3 O-O
Ty: We're pretty much on book here until Al's 5. h3. Even that could be considered a transposition, however. I'm using my now-favorite King's Indian Defense against Al's 1. d4. We're both well-versed in our respective systems, so it should make for a good clash.
6. Nbd2 Nbd7
7. c3 c5
8. Bb5 Qb6
9. Qb3 Nd5
Ty: My Knight's not unprotected because 10. Qxd5 Qxb5.
10. Nc4 Qc7
11. Bh2 N7f6
12. Ncd2 Be6
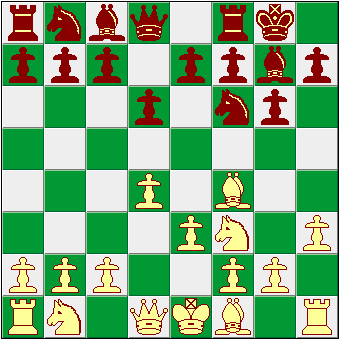
13. O-O?
Ty: As a general rule getting your King to safety is an excellent idea before proceeding with other plans. So this is a mistake only because 12. ... Be6 set up a revealed attack against White's Queen. It will cost a pawn and bad Knight-Rook exchange. Better is 13. Bc4.
13. ... Nxe3!
14. Bc4 Nxf1
15. Kxf1 cxd4
Ty: I played 15. ... cxd4 because it allows me to get more pieces off the board compared to the more obvious 15. ... Bxc4 Qxc4, which doesn't allow cxd4 thanks to the unprotected nature of my Queen. I'm attempting to hold my slight material advantage into the end game by trading off pieces. If it works, my extra material should prove decisive.
16. Bxe6 dxc3
17. Ng5 cxd2
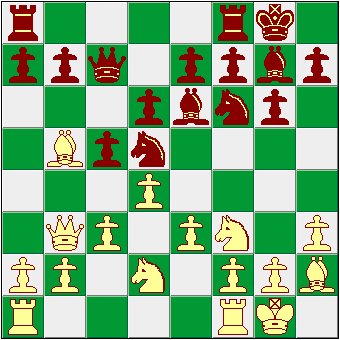
Ty: I also considered playing 17. ... cxb2 and threating the Rook. I think it's got good possibilities with a revealed attack coming from the g7 Bishop, but I couldn't count on its success, whereas 17. ... cxd2 at least kept me even in material.
18. Rd1 Qa5
Ty: This avoids the threat of 19. Bxf7+ Kh8 20. Ne6! which would fork Black's Queen and Rook. In addition, it has the virtue of protecting the d2 pawn while threatening White's g5 Knight.
19. Bxf7+ Kh8
20. Bf4 Bh6
21. h4 Bxg5
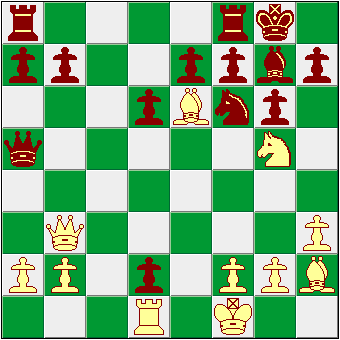
22. Bxg5 Qf5?
Ty: This gets my Queen into the heart of the action, but Al quickly shows me why this should have been 22. Qe5. Being wrong costs me a tempo.
23. Be6 Qe5
24. Rxd2 Ne4
25. Be3!
Ty: I can't tell you how much I really wanted Al to play 25. Re2 to pin my Knight to my Queen (in theory). I would've followed with 25. ... Ng3+ and the f2 pawn can't take thanks to my f8 Rook. Sadly, Al saw this dastardly combination and promptly thwarted it.
25. ... Nxd2+
26. Bxd2
26. ... Rf6
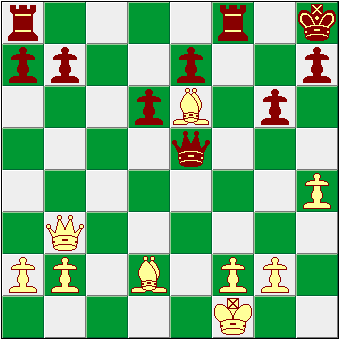
Ty: The 26. ... Rf6 is utterly essential because of the possibility of 27. Bc3 which pins the Queen and King. I couldn't come up with another way to get out of this, even though it will cost a Rook for a Bishop if White plays 27. Bc3.
27. Qxb7? Raf8
Ty: With the repositioning of my Rooks on the f-file, White must play 28. f3 or be checkmated in short order. This will cost a bishop. I think 27. Bc3 would've been a much better move for White.
28. f3 Qxe6
29. Kf2 Qc8
30. Qxa7 Qc5+
0-1
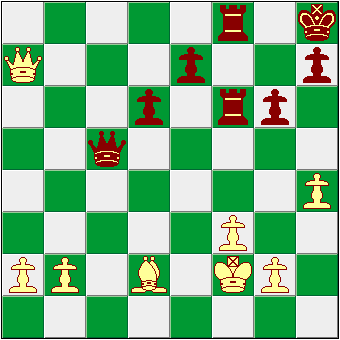
Ty: A pretty tight game on the whole. Black's two Rooks look like a big advantage, but that can be pretty illusionary against two Bishops. Just working out the threats posed by the dual Bishop combination lead me to believe that they're a lot more powerful than I previously supposed.
|